Sending mail in Lumen via SMTP

lumenSending mail in Lumen via SMTP

‘illuminate\mail’ for sending mail through lumen so here is how i configure smtp mail with lumen.

1:- Install illuminate\mail to your lumen setup by entering following command

composer require illuminate\mail

2:- Edited the bootstrap/app.php uncommenting the following lines

 $app->withFacades();

 $app->register(App\Providers\AppServiceProvider::class);

3:- Open up your app/Providers/AppServiceProvider.php and in the register method, add the following

 $this->app->singleton(‘mailer’, function ($app) { 

            $app->configure(‘services’);  return $app->loadComponent(‘mail’, ‘Illuminate\Mail\MailServiceProvider’, ‘mailer’);

  });

This will enable the Mail

NOTE: If you haven’t got it already, you will need to copy/create the config/mail.php file:https://github.com/laravel/laravel/blob/master/config/mail.php

( Or you can get above file from laravel’s config directory )

Change the orientation in Birt reporting tools to Landscape and portrait

I am just joined the Birt reporting tool, one of the most popular reporting tools in java , and open source too,
using the help I could developed the report and deployed it on the web and Export it to PDF and EXCEL in easy way and few steps .

the problems come when I want to change the orientation from portrait to landscape
I had search alot , I think that my BIRT version wasn’t new enough , it only support from the IDE to make the view Fixed layout or Auto Layout
then


HOW TO SOLVE IT :
open the Birt in xml-source and search for the page-setup tag , and copy below properties and it will be handled.
 
<page-setup>
        <simple-master-page name="Simple MasterPage" id="2">
            <property name="type">a4</property>
            <property name="orientation">landscape</property>
            <property name="topMargin">0.25in</property>
            <property name="leftMargin">0.25in</property>
            <property name="bottomMargin">0.25in</property>
            <property name="rightMargin">0.25in</property>
            <page-footer>
                <text id="3">
                    <property name="contentType">html</property>
                    <text-property name="content"><![CDATA[<value-of>new Date()</value-of>]]></text-property>
                </text>
            </page-footer>
        </simple-master-page>
    </page-setup>

important Library in jQuery

Hey,


bootstrap2_logo

Am Going to share two important library which is need in easy to integrate and customize as per your need.

1.jquery.customSelect 

2.bootboxjs

Explanation : jquery.customSelect 

What it be

This lightweight, unintrusive technique uses the native select box functionality of the web browser, and overlays a syllable <span> element in order to achieve your desired look. Since it makes use of default browser functionality, it can be treated just like any ordinary HTML select box. This concept is based on Ryan Fait’s method of styling select boxes, but as a jQuery Plugin.

How to use

HTML

  1. <!–Insert after jQuery–>
  2. src=‘js/customSelect.jquery.js’>
  3. link=‘css/customSelect.jquery.css’>

Javscript

  1. $(document).ready(function(){
  2.     $(‘#standard’).customSelect();
  3. });

Explanation :bootboxjs 

The library belongs to bootstrap.Using the we make alert,confirmation,promotion and custom box.

Alert

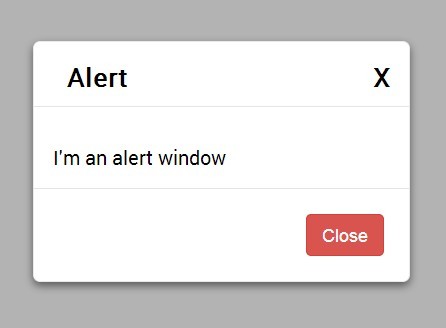
A simple alert dialog with a single button. Pressing the ESC key or clicking the close button dismisses the dialog.

simple-custom-dialog-popup-plugin-with-jquery

example : 

bootbox.alert("Your message here…")

Ref :

http://bootboxjs.com/


https://github.com/blissmedia/jquery-customselect

WordPress add submenus to custom menu

Create Menu

add_menu_page( $page_title, $menu_title, $capability, $menu_slug, $function, $icon_url, $position );

Create a sub menu

add_submenu_page( $parent_slug, $page_title, $menu_title, $capability, $menu_slug, $function);

Note

In situations where a plugin is creating its own top-level menu, the first submenu will normally have the same link title as the top-level menu and hence the link will be duplicated. The duplicate link title can be avoided by calling the add_submenu_page function the first time with the parent_slug and menu_slug parameters being given the same value.


function clivern_plugin_top_menu(){
add_menu_page('Eastview Custom', 'Eastview Custom', 'manage_options', 'my-top-level-handle');
add_submenu_page( 'my-top-level-handle', 'GLS Lunch Orders', 'GLS Lunch', 'manage_options', 'my-top-level-handle','my_custom_menu_page');
add_submenu_page( 'my-top-level-handle', 'New Item', 'New item', 'manage_options', 'new-handle','my_custom_menu_page1');
}
add_action('admin_menu','clivern_plugin_top_menu');

Laravel throttle

If you are using Laravel’s built-in AuthController class, theIlluminate\Foundation\Auth\ThrottlesLogins trait may be used to throttle login attempts to your application. By default, the user will not be able to login for one minute if they fail to provide the correct credentials after several attempts. The throttling is unique to the user’s username / e-mail address and their IP address:

If you’re not familiar with it, rate limiting is a tool—most often used in APIs—that limits the rate at which any individual requester can make requests.

That means, for example, if some bot is hitting a particularly expensive API route a thousand times a minute, your application won’t crash, because after the nth try, they will instead get a429: Too Many Attempts. response back from the server.

Usually a well-written application that implements rate limiting will also pass back three headers that might not be on another application: X-RateLimit-Limit, X-RateLimit-Remaining, and Retry-After(you’ll only get Retry-After if you’ve hit the limit). X-RateLimit-Limit tells you the max number of requests you’re allowed to make within this application’s time period, X-RateLimit-Remaining tells you how many requests you have left within this current time period, and Retry-After tells you how many seconds to wait until you try again. (Retry-After could also be a date instead of a number of seconds)

DOT6h07hQXSgUALNAyFF_understanding-laravel-middleware

This interface defines the public methods a throttler class must implement. All 5 methods here accept no parameters.

The 'attempt' method will hit the throttle (increment the hit count), and then will return a boolean representing whether or not the hit limit has been exceeded.

The 'hit' method will hit the throttle (increment the hit count), and the will return $this so you can make another method call if you so choose.

The 'clear' method will clear the throttle (set the hit count to zero), and the will return $this so you can make another method call if you so choose.

The 'count' method will return the number of hits to the throttle.

The 'check' method will return a boolean representing whether or not the hit limit has been exceeded.

Example to user Throttle
->middleware(‘throttle’) //60 request per minutes

->middleware(‘throttle:30’) //30 request per minutes

->middleware(‘throttle:30,5’) //30 request 5 minutes

useage :

EXAMPLE1

Route::get(‘foo’, [‘middleware’ => ‘throttle:2,2’, function () {
return ‘Why herro there!’;
}]);

EXAMPLE2

Route::get(‘/’,[ ‘middleware’ => ‘throttle:5’,function () {
return view(‘shop.index’);
}]);

EXAMPLE3


Route::group(['prefix' => 'api', 'middleware' => 'throttle:5,10'], function () {
    Route::get('people', function () {
        return Person::all();
    });

});

EXAMPLE4

Route::group(['prefix' => 'auth', 'namespace' => 'Auth'], function(){

    Route::group(['middleware' => 'guest'], function(){
        // Login
        Route::get('login', ['as' => 'auth.login', 'uses' => 'AuthController@getLogin']);
        Route::post('login', ['as' => 'auth.login.store', 'before' => 'throttle:2,60', 'uses' => 'AuthController@postLogin']);

        // Register
        Route::get('register', ['as' => 'auth.register', 'uses' => 'AuthController@getRegister']);
        Route::post('register', ['as' => 'auth.register.store', 'uses' => 'AuthController@postRegister']);
    });

    Route::group(['middleware' => 'auth'], function(){
        // Logout
        Route::get('logout', ['as' => 'auth.logout', 'uses' => 'AuthController@getLogout']);
    });

});

Route::controllers([
    'password' => 'Auth\PasswordController',
]);

WordPress File Header Comments

The best thing about WordPress is that everything it does is extensible, this means that developers can do anything they want by building on top of the WordPress framework.

When creating files that need to be used by WordPress they are defined into 3 areas, they are either WordPress themes, WordPress plugins or Page templates.

Each one of these types of files need to be defined to WordPress so that it understands how to use them. To help WordPress understand how to use them you need to provide it with a number of different parameters in comments at the top of the main file.

WordPress Plugin Header Comments

When you create a new WordPress plugin you need to define the plugin by using file header comments. These comments should be placed in the main PHP file for the plugin. This will be the first file that will run when the plugin is activated. This is where you will place the action or filters to perform your functionality. When you add these comments to the PHP file WordPress understands that this is a plugin and will add it to the plugin dashboard area and will allow the user to activate the plugin.

If the plugin does not have the header information then the user will not be able to activate the plugin and the code will never run.

Here is the default information that is required by WordPress for a plugin:

  • Plugin Name
  • Plugin URL
  • Plugin Description
  • Version number
  • Author Name
  • Author URL
  • License Information

Therefore the comments will look something like this.

<?php
/*
Plugin Name: Name Of The Plugin
Plugin URI: http://URI_Of_Page_Describing_Plugin_and_Updates
Description: A brief description of the Plugin.
Version: The Plugin's Version Number, e.g.: 1.0
Author: Name Of The Plugin Author
Author URI: http://URI_Of_The_Plugin_Author
License: A "Slug" license name e.g. GPL2
*/
?>

The information within the comment will be used to display a description to the user on the plugin dashboard.

WordPress Theme Header Comments

When you develop a new WordPress theme you need to do the same thing as the plugin and use a block of comments to define these files as a WordPress theme. Also these comments are going to be used as a description in the theme selector screen.

The difference with Theme development is that you need to place these comments at the top of the theme stylesheet.

The information is similar but it is going to help your theme be found when searched for.

Two themes are not allowed the same information the Theme comments block, if you create your theme by copying an existing theme then you will need to change these comments before you can use the theme.

Here is the information that is expected from the Theme file headers.

  • Theme Name
  • Theme URL
  • Theme Description
  • Author
  • Author URL
  • Version Number
  • Search Tags
  • License Information

Here is what the file header comments will look like.

/*
Theme Name: Twenty Ten
Theme URI: http://wordpress.org/
Description: The 2010 default theme for WordPress.
Author: wordpressdotorg
Author URI: http://wordpress.org/
Version: 1.0
Tags: black, blue, white, two-columns, fixed-width, custom-header, custom-background, threaded-comments, sticky-post, translation-ready, microformats, rtl-language-support, editor-style, custom-menu (optional)

License:
License URI:

General comments (optional).
*/

Page Templates Header Comments

The third developer file header comments that are needed in your WordPress site are Page template file headers. If you want to create new page templates then you will need to add this comment to the top of the file.

These comments are very simply all you need is the Page template name and the description for the page.

<?php
/*
* Template Name: Custom Page Template
* Description: Description of the page template
*/
?>

REFERENCE : http://www.paulund.co.uk/

Rich Text Notification in Chrome –

Create a Chrome extension

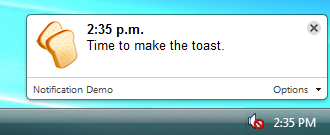
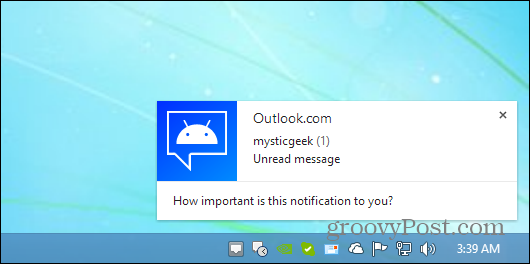
Use rich desktop notifications to notify users that something important has happened. Notifications appear outside the browser window. As the following snapshots show, the details of how notifications look and where they’re shown depend on the platform.


notification-windows

You create the notification window using a bit of JavaScript and, optionally, an HTML page packaged inside your extension.


First, declare the notifications permission in your manifest:

manifest.json

{

 “name”: “Notification Show”,

 “version”: “1.1”,

 “description”:

  “Shows off desktop notifications, which are \”toast\” windows that pop up on the desktop.”,

 “icons”: { “128”: “128.png”},

 “permissions”: [

   “notifications”

 ],

“background”: { “scripts”: [“myscript.js”] },

 “manifest_version”: 2,

 “web_accessible_resources”: [

   “128.png”

 ]

}


myscript.js


*
Displays a notification with the current time. Requires “notifications”
permission in the manifest file (or calling
“Notification.requestPermission” beforehand).
*/
function show() {
new Notification(“Demo Title”, {
icon: ’48.png’,
body: ‘Time to make the toast.’
});
}

// Conditionally initialize the options.
if (!localStorage.isInitialized) {
localStorage.isActivated = true; // The display activation.
localStorage.frequency = 1; // The display frequency, in minutes.
localStorage.isInitialized = true; // The option initialization.
}

// Test for notification support.
if (window.Notification) {
// While activated, show notifications at the display frequency.
if (JSON.parse(localStorage.isActivated)) {
var interval = 0; // The display interval, in minutes.
setInterval(function() {
interval++;
if (
JSON.parse(localStorage.isActivated) &&
localStorage.frequency <= interval
) {
show();
interval = 0;
}
},15000);
}
}

Finally need to enable the extension in a chrome browser

Desktop notification

desktop notifications for Chrome, Firefox, Opera and Safari.

Desktop-Notification


Example Code

myFunction();
function myFunction() {
setInterval(function(){ notifyMe(); }, 3000000);
}

// request permission on page load
document.addEventListener(‘DOMContentLoaded’, function () {
if (Notification.permission !== “granted”)
Notification.requestPermission();
});

function notifyMe() {
if (!Notification) {
alert(‘Desktop notifications not available in your browser. Try Chromium.’);
return;
}

if (Notification.permission !== “granted”)
Notification.requestPermission();
else {
var notification = new Notification(‘Notification title’, {
icon: ‘http://cdn.sstatic.net/stackexchange/img/logos/so/so-icon.png&#8217;,
body: “Hey there! You’ve been notified!”,
});

notification.onclick = function () {
window.open(“http://www.google.com&#8221;);
};

}

}


NOTE:


We’re using the W3C Notifications API, documented at MDN. Do not confuse this with the Chrome extensions notifications API, which is different. Chrome extension notifications obviously only work in Chrome extensions, don’t require any special permission from the user, support rich text notifications, but disappear automatically and the user may not notice they have been triggered). W3C notifications work in many browsers (see support on caniuse), require user permission, stack on top of the previous notification and don’t automatically disappear in Chrome (they do in Firefox).

Final words

Notification support was in continuous flux, with various APIs being deprecated over the last three years. If you’re curious, check the previous edits of this answer to see what used to work in Chrome, and to learn the story of rich HTML notifications.

Unable to configure cron in Awazon EC2-server

Fixing A “Bad Minute” Error Message When Trying To Use Crontab With Certain Unix Text Editors

Fixing A “Bad Minute” Error Message When Trying To Use Crontab With Certain Unix Text Editors

images

If each of your cron jobs do not appear on a single line in the crontab text file, you’ll get an error like this:

1
2
3
/tmp/crontab.XXXXXX.crontab":1: bad minute
errors in crontab file, can't install.
Do you want to retry the same edit?

This problem most often occurs because you’re using a text editor, such as pico, that fakes word wrapping by adding a newline when it reaches a certain column position.

Crontab delimits jobs with line breaks (newlines). Each job occupies one line. Therefore, if crontab sees anything other than an integer in the first column of a line, it throws the “bad minute” error, since the minute argument is the first one crontab encounters.

The simple fix is to go to delete the line breaks added by pico / your *nix editor. You can most easily do that by putting your cursor on the first character of each extra line, then hit the backspace key until that line is joined back up with the previous one, and repeating the process until your entire cron command is on one line.

Reference

http://newtips.co/st/questions/33642920/decoding-html-tags-in-laravel-5.html

Decoding HTML tags in Laravel 5

I am using CKeditor for my Laravel 5.1 custom CMS. When I request content of stored pages in the database on my view, they appear with HTML tags like <p>Hello world</p>. I have used html_entity_decode() with and without the charset specified to no avail. It is also worth mentioning that I use Blade template engine at my view. Hence, my demo code looks like

$post->content = '<p>Hello world</p>'; // from the database from controller
{{html_entity_decode($post->content)}} //did not decode

I also tried using it in my controller instead and it did not change anything like this

$post->content = html_entity_decode($post->content); //before sending it to the view

I need your help to address this issue.

SOLUTION

Instead of doing {{html_entity_decode($post->content)}}, try this instead:

{!! $post->content !!}